2.1. Node Connection
This section will introduce how to connect nodes added to the workflow
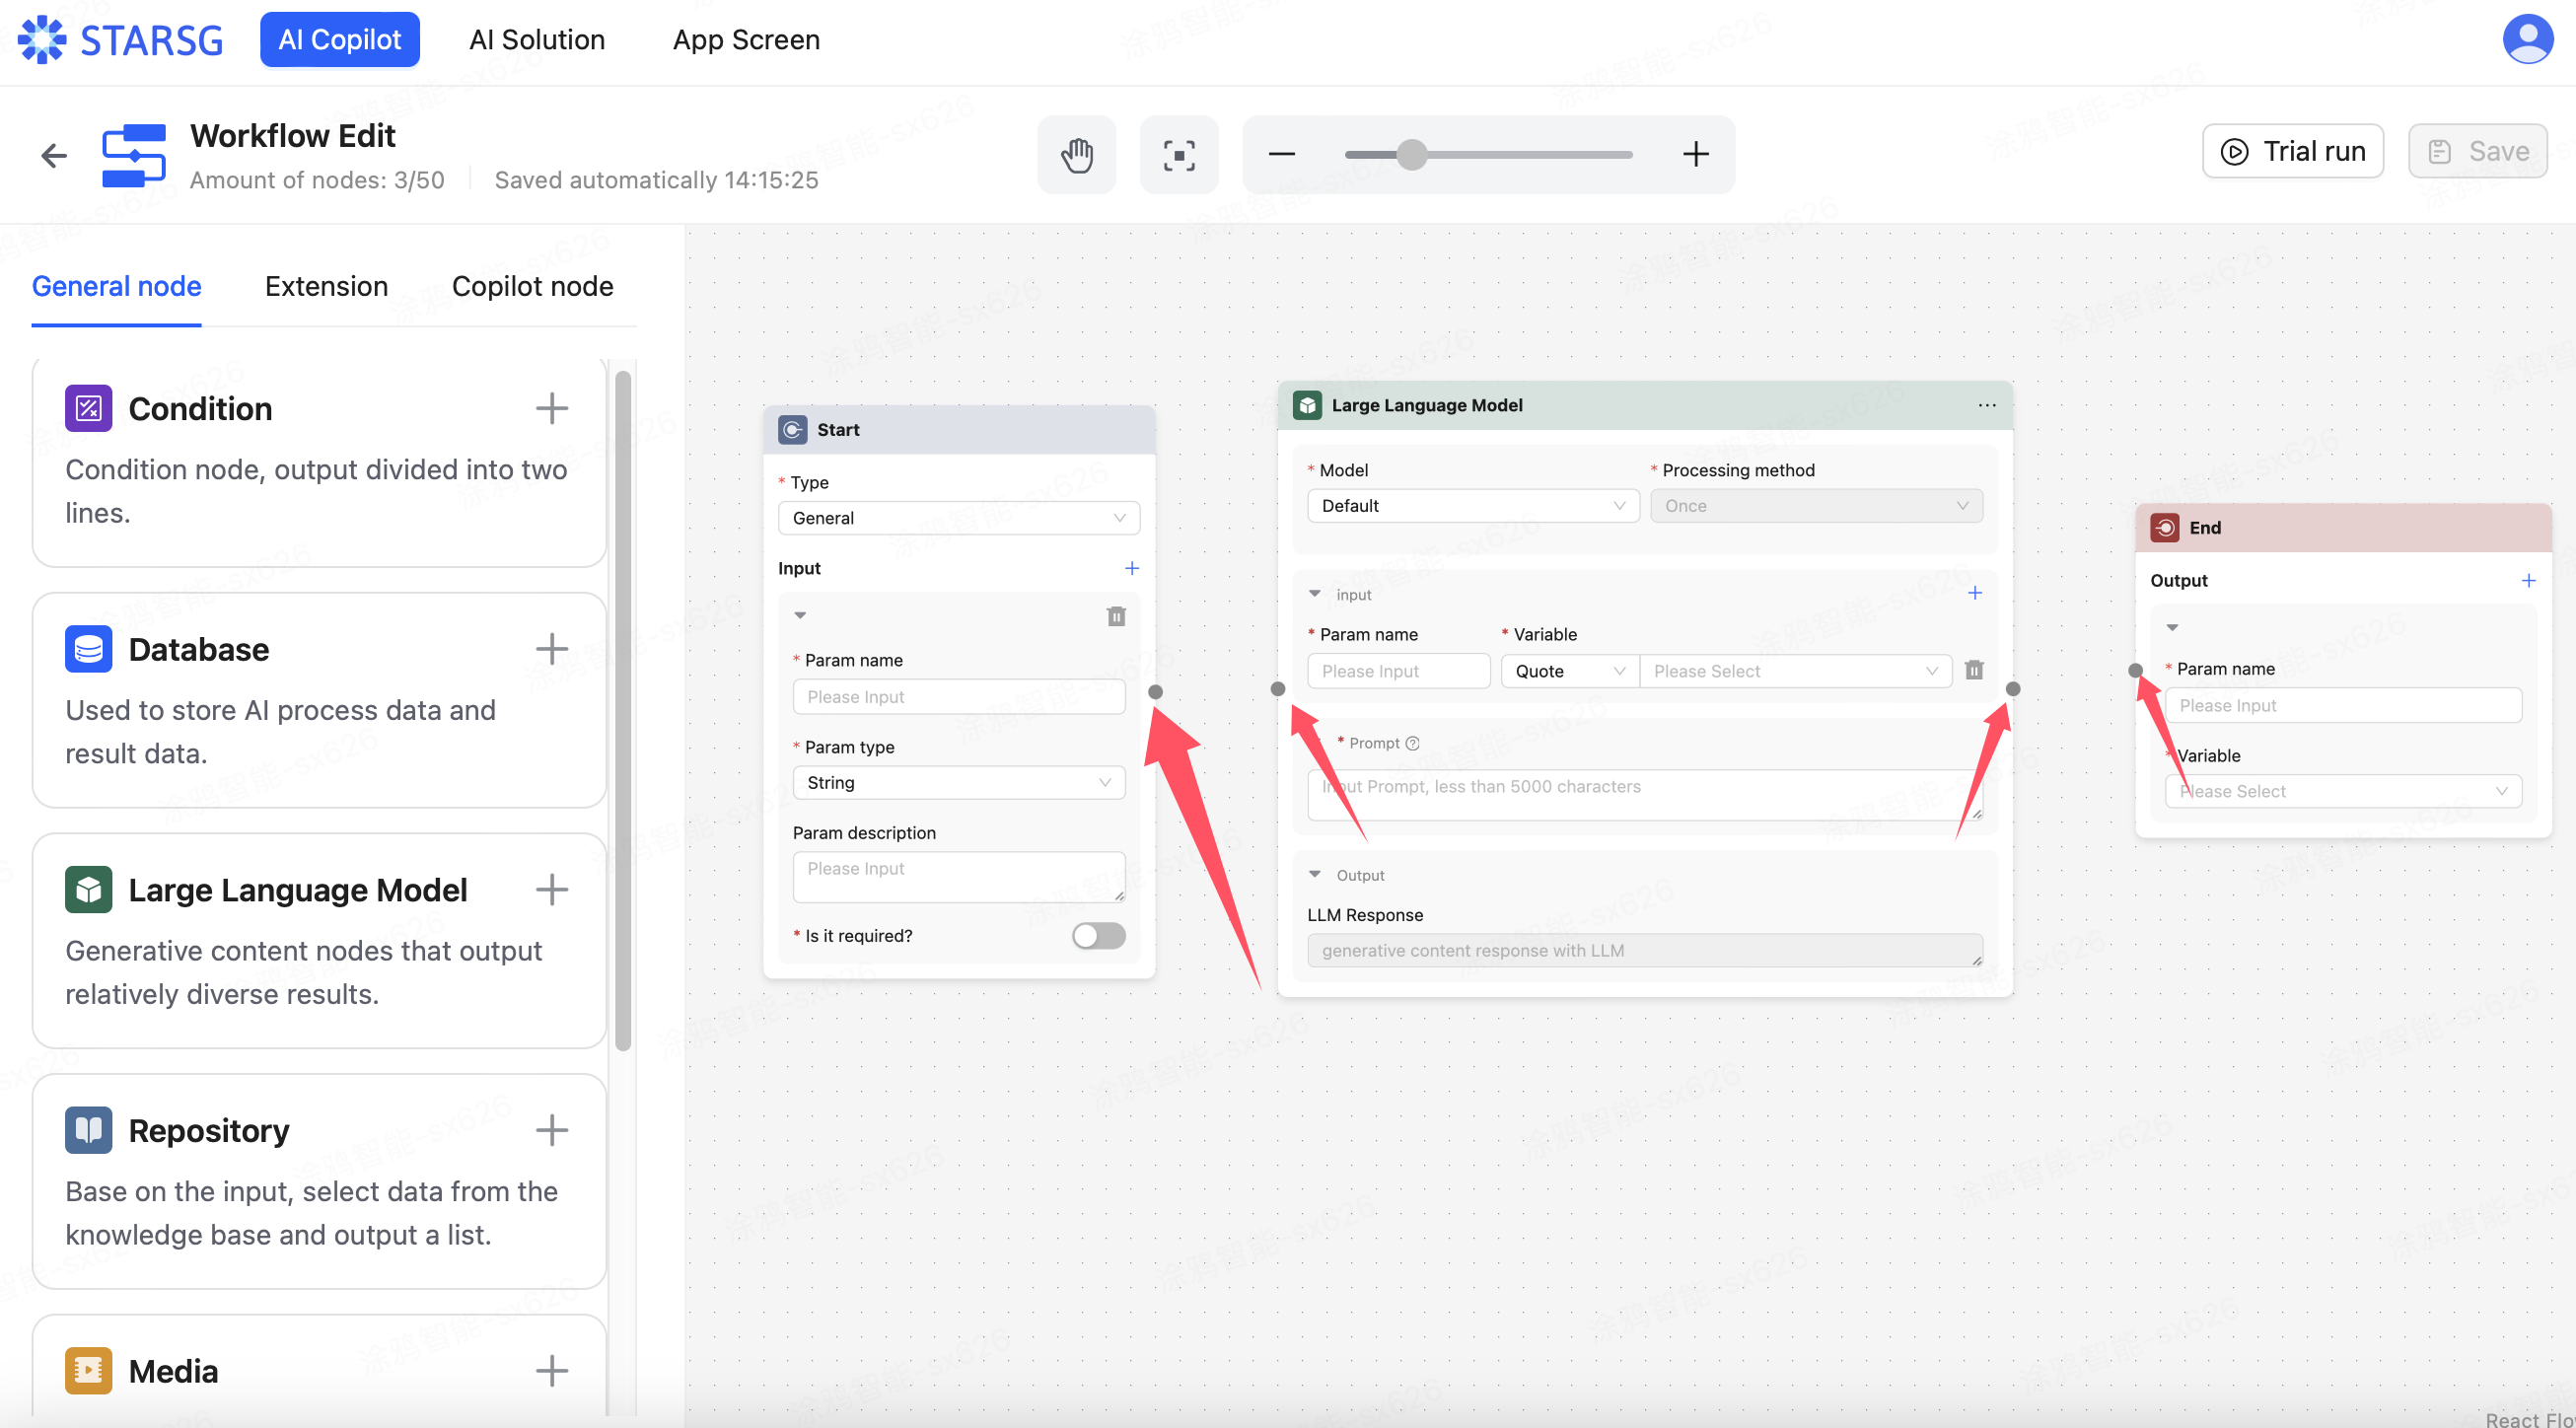
In the main page of My Agent, click on the project you want to edit. After entering, click Edit Workflow. Once on the page, after adding the nodes you need to use, you can see that there are small gray dots on both sides of each node. Long press the small dot and drag it to the small dot of the next node to complete the connection between the nodes.
- You cannot connect from an entry node to an entry node or from an exit node to an exit node.
- Each lead-out can only have one line (condition nodes have two lead-out nodes, each node can have one line), and lead-ins can have multiple lines (no restrictions).
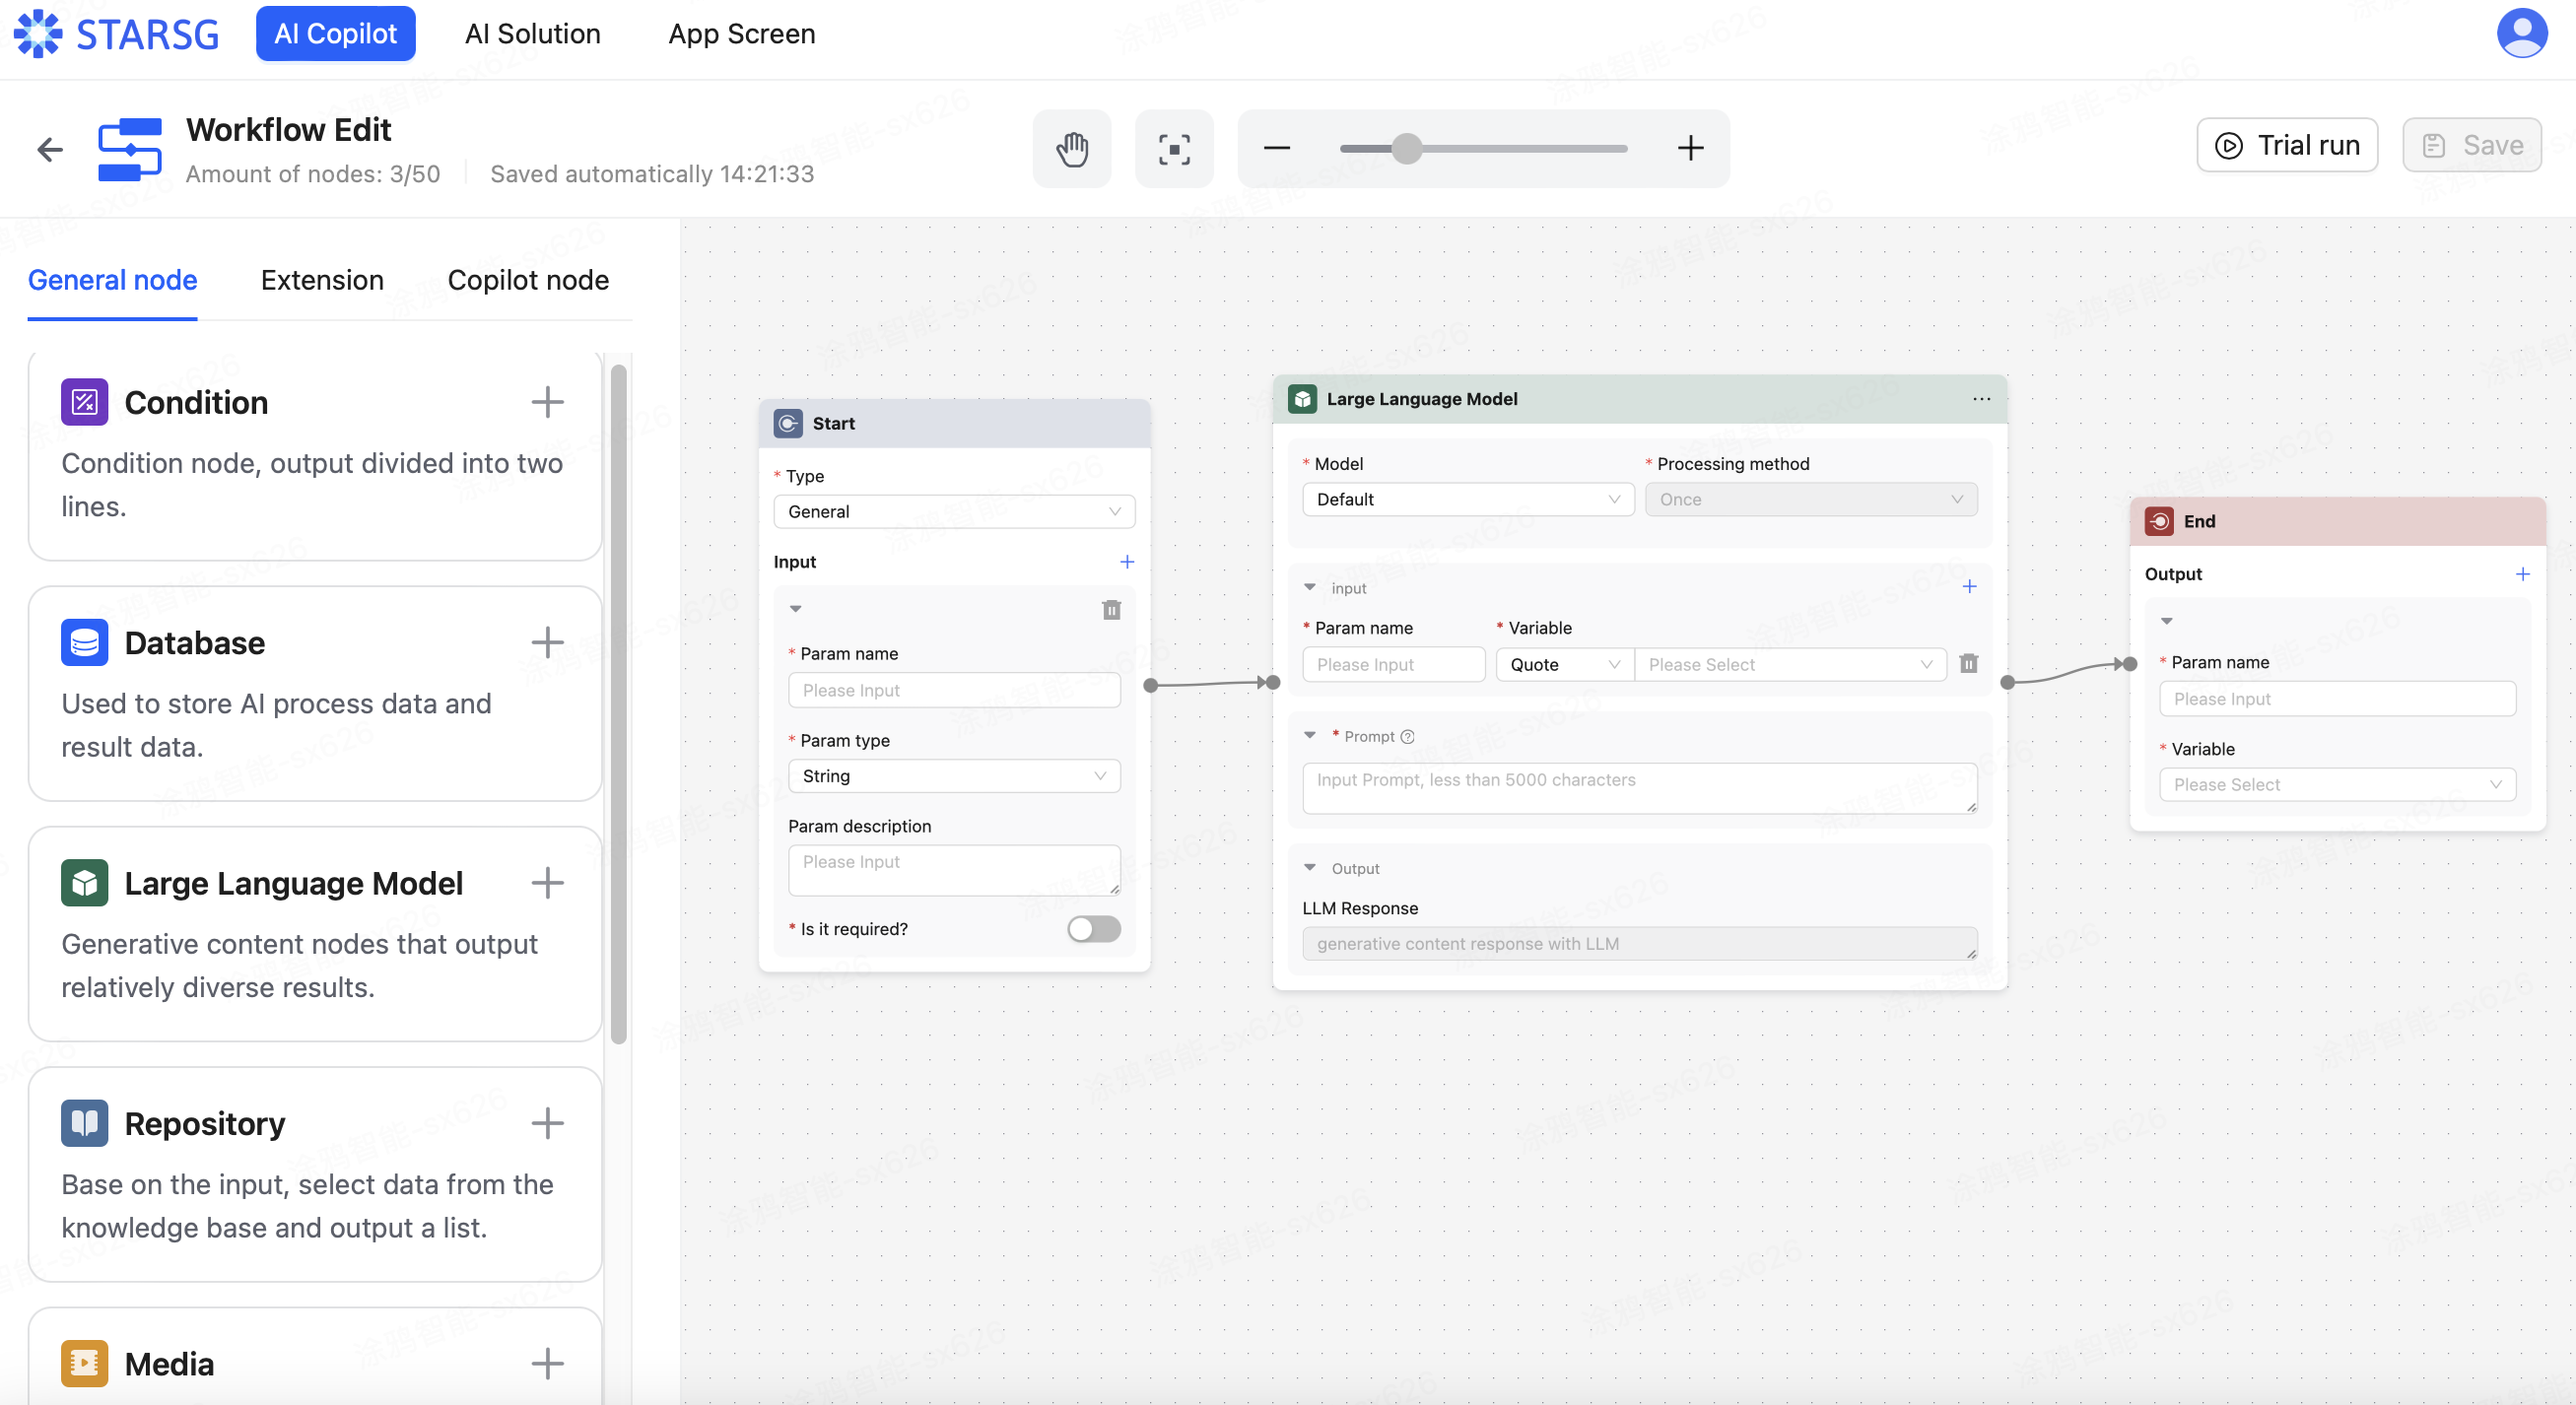
To cancel the connection between two nodes, move the mouse pointer to the line and click.
Note: All nodes added to the editing area must be connected, otherwise, trial runs cannot be performed.